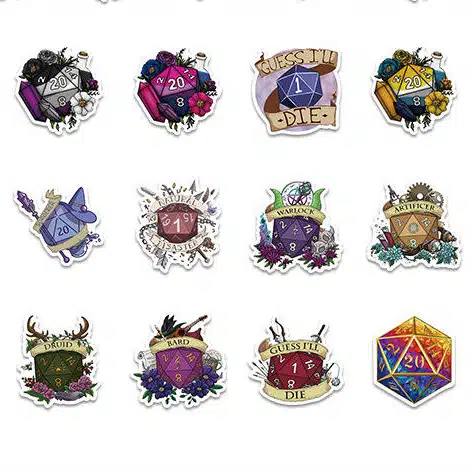
Custom Miniature
for Board Games & Tabletop Games
Choosing the right scale and material is the first decision in custom game miniature manufacturing. At FUNWAY, we produce custom board game miniatures in plastic, resin, and metal—ranging from 10mm army figures to 40mm+ collector pieces. We do not choose scale from the render alone: every figure must survive tooling, fit the box and insert, and remain stable through repeated gameplay. If the scale is pushed too far, weapons break, bases tip, and facial detail disappears—problems that are expensive to fix after mold release.
Miniature Types We Produce
Specification | Details |
|---|---|
Materials | ABS, PVC, HIPS (plastic) / Resin (polyurethane) / Zinc alloy, Pewter (metal) |
Scales | 10–15mm, 25–28mm, 32–35mm, 40mm+ (custom available) |
Measurement Baseline | Eye-level or total height (locked before sculpt approval) |
Base Types | Integrated (molded-in) / Slot-base / Socket assembly / Custom base |
MOQ | 1 piece (resin prototype) / 500+ pieces (injection molding bulk) |
Turnaround | Resin prototype: 5–7 days / Injection mold + sample: 15–20 days / Bulk: 20–30 days |
Color Options | Pre-colored plastic, hand-painted, spray-coated, or custom color matching |
Packaging | Blister pack, tray insert, or loose bulk (coordinated with box design) |


Complete Custom Board Game Components
A board game is a system of interconnected components. At FUNWAY, we manufacture every element — from the board and box down to the smallest token — as one integrated production, not separate parts. Here are all the customizable components that go into a complete board game. And of course, you can choose to customize the whole or just a part of it.
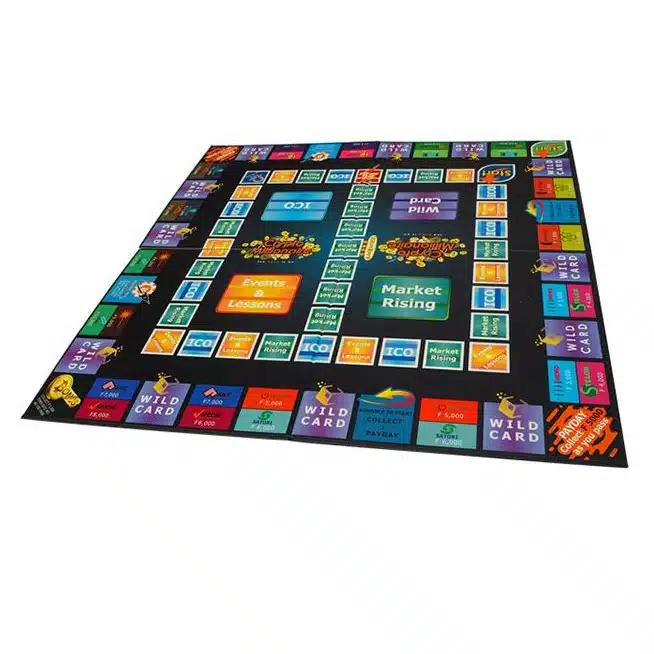
| Folded or rigid boards up to 600×900mm with hinge alignment and surface finishing | |

| Telescope, rigid, and magnetic boxes engineered for fit and stacking strength | |

| Neoprene play surfaces and foldable player screens | |
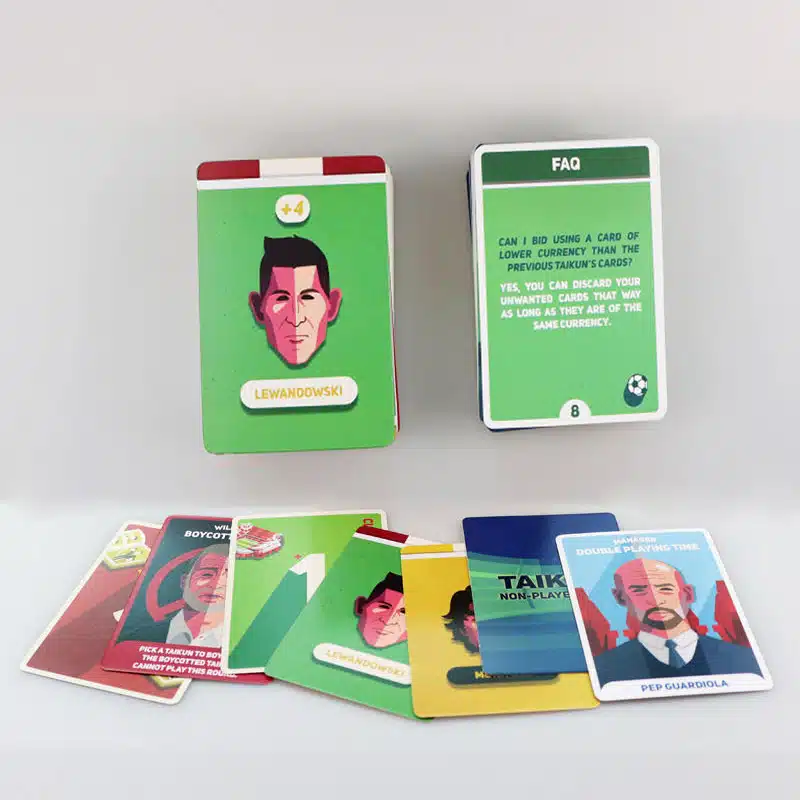
| Cardstock selection, clean cutting, and coatings for stable shuffling | |

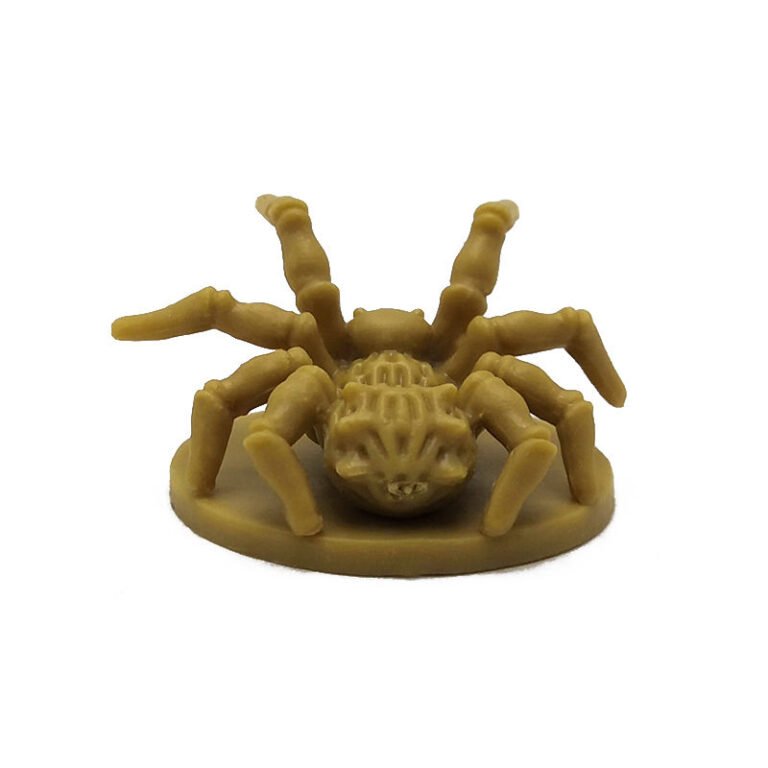
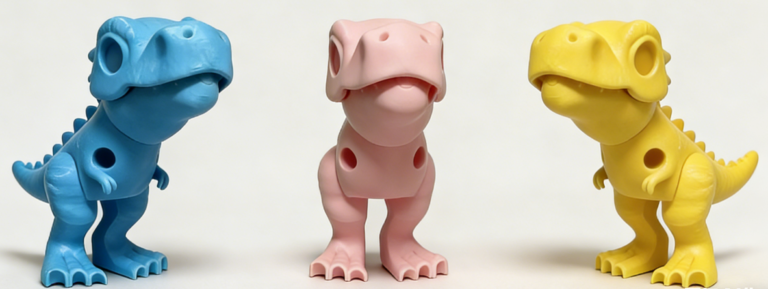
| PVC and resin figures with mold review and scale consistency control | |
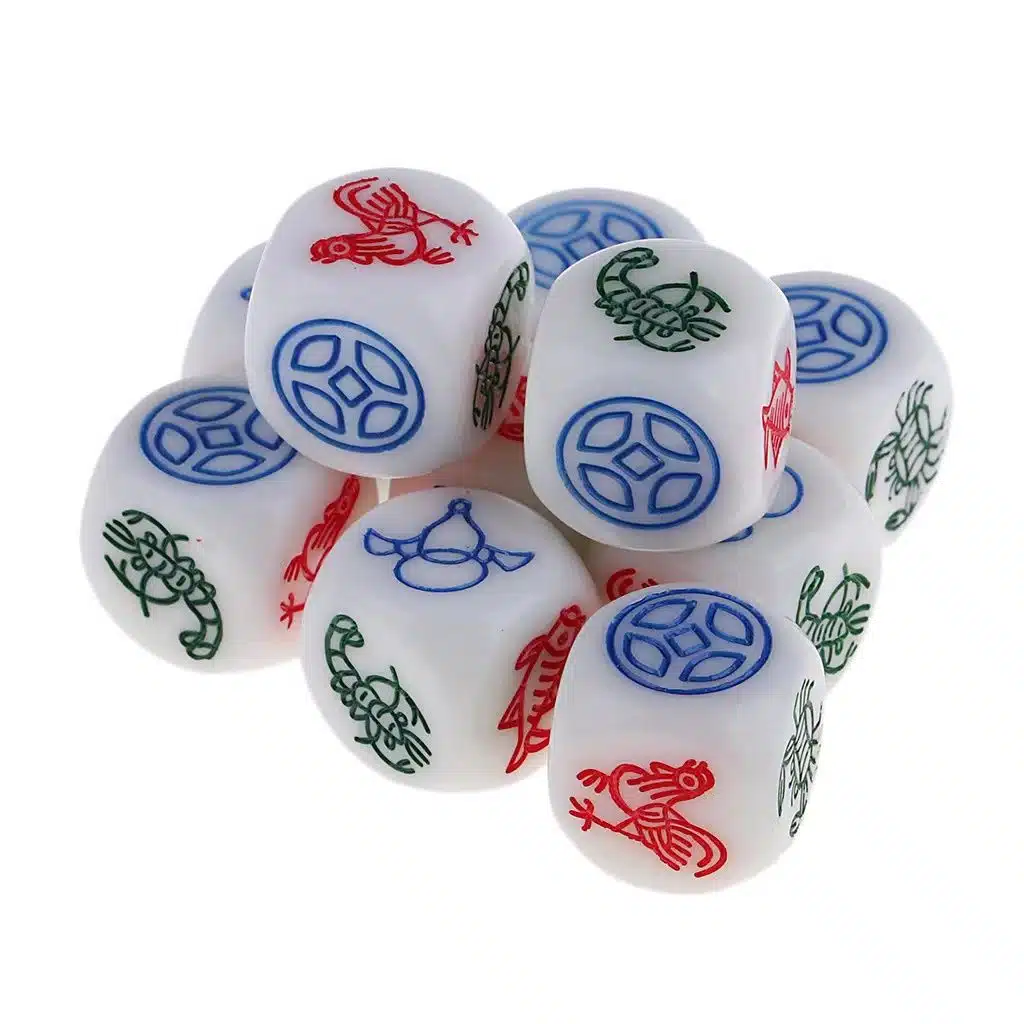
| Precision dice in multiple materials, sizes, and custom face designs | |
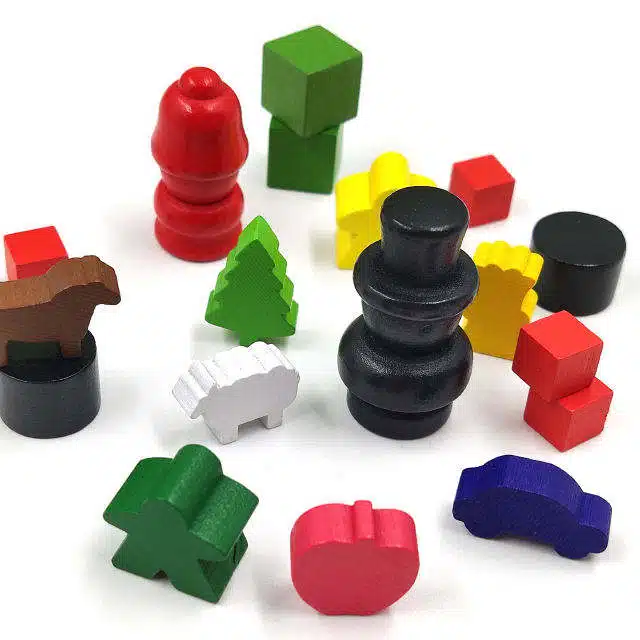
| Player markers in wood or plastic with precise silhouettes and color control | |
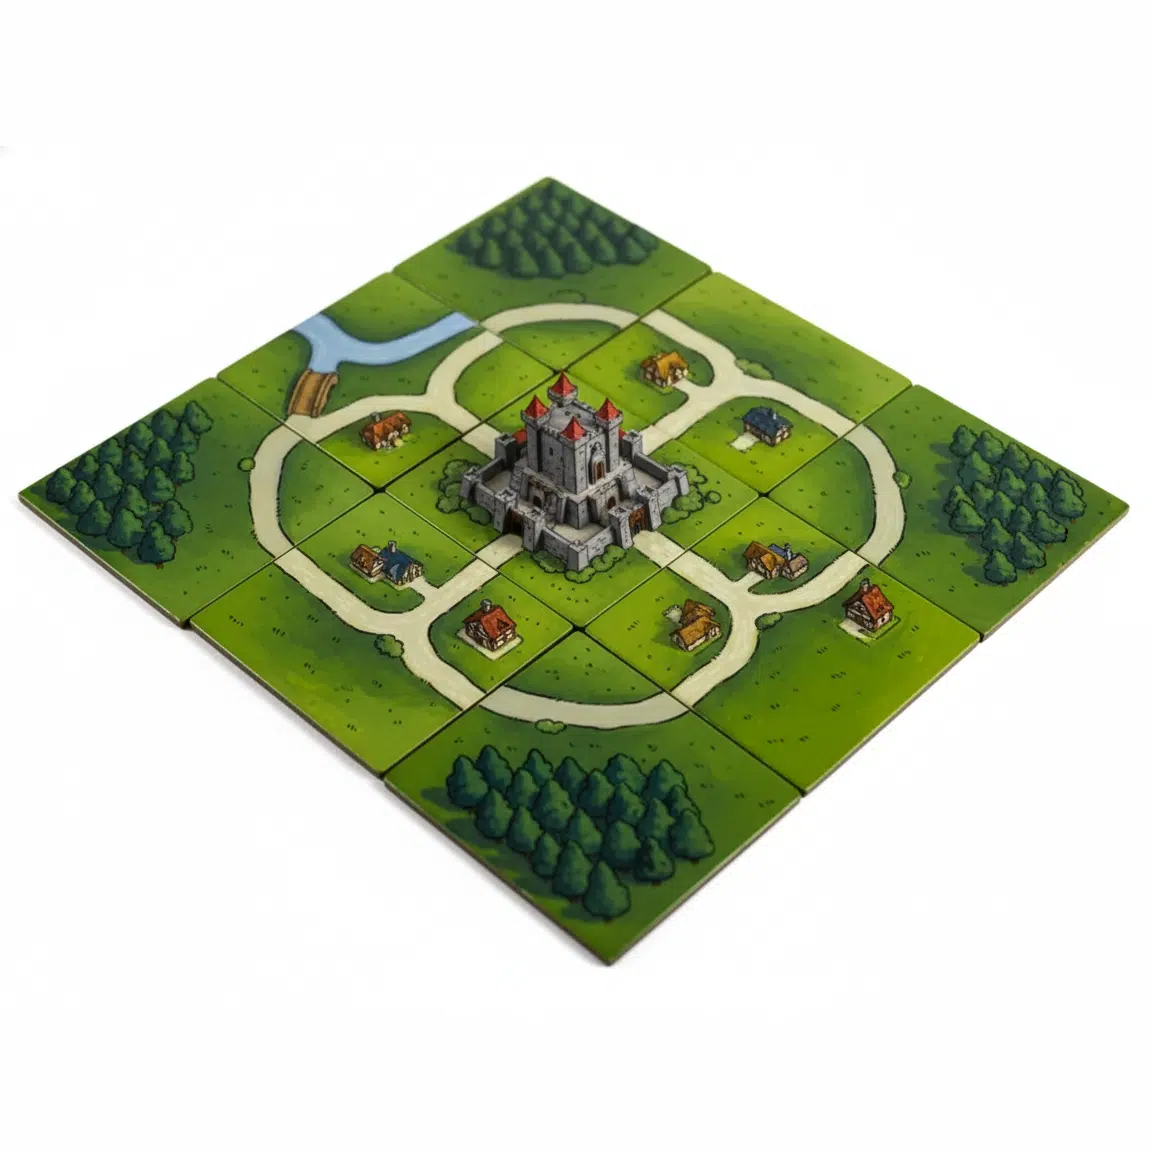
| Map and terrain modules in cardboard, plastic, or acrylic | |
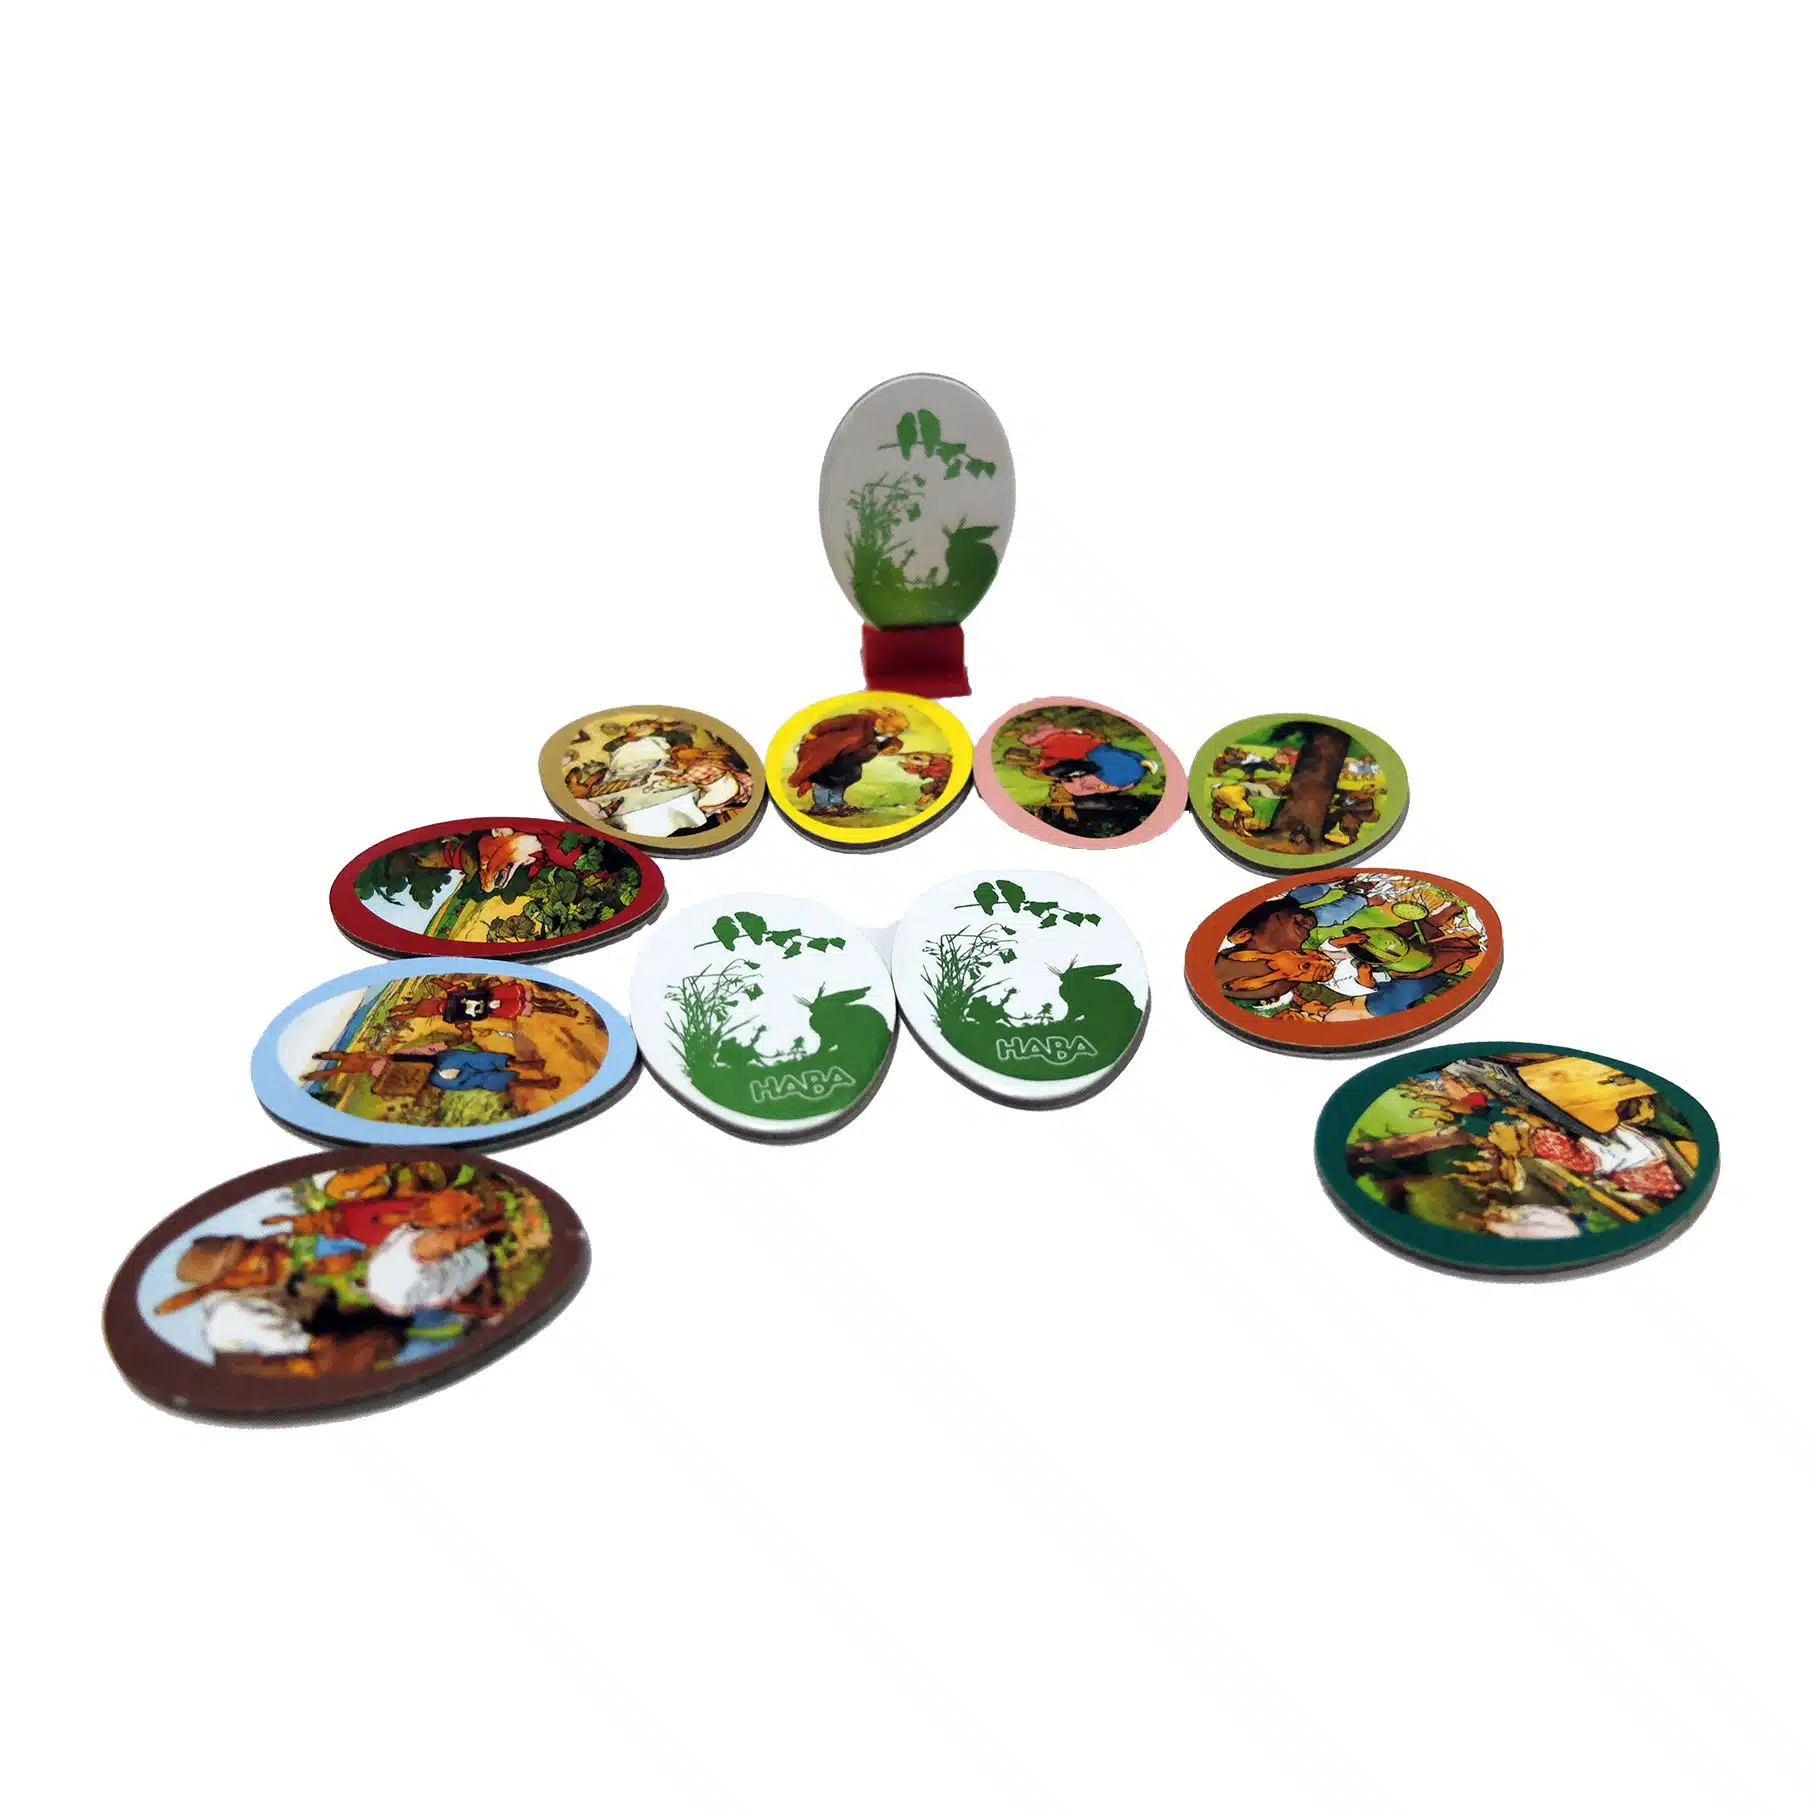
| Punchboard chips, wooden discs, and counters for scores and resources | |
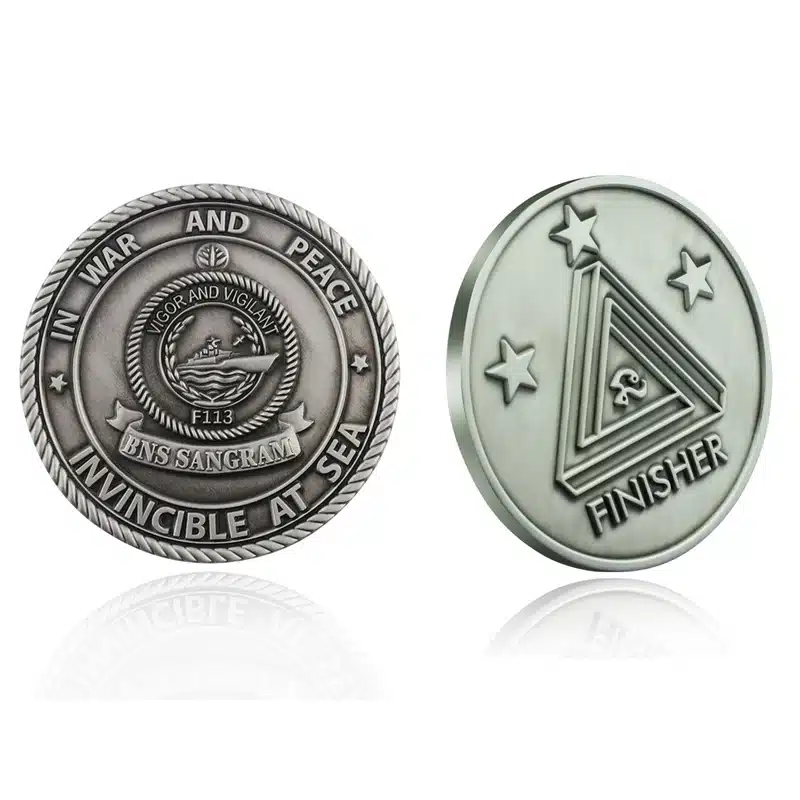
| Metal coins, wooden resources, plastic pawns, standees, and specialty parts | |
| Printed paper essentials for rules, currency, and scorekeeping |
Every component above is manufactured through our integrated production system — from component mapping and engineering review through sampling and mass production. Learn more about our complete custom board game printing services.
Transparent Pricing
Custom Game Miniature Pricing Examples
See real-world pricing examples for popular board game styles. Every project is unique. these estimates help you plan your budget before requesting a detailed quote.
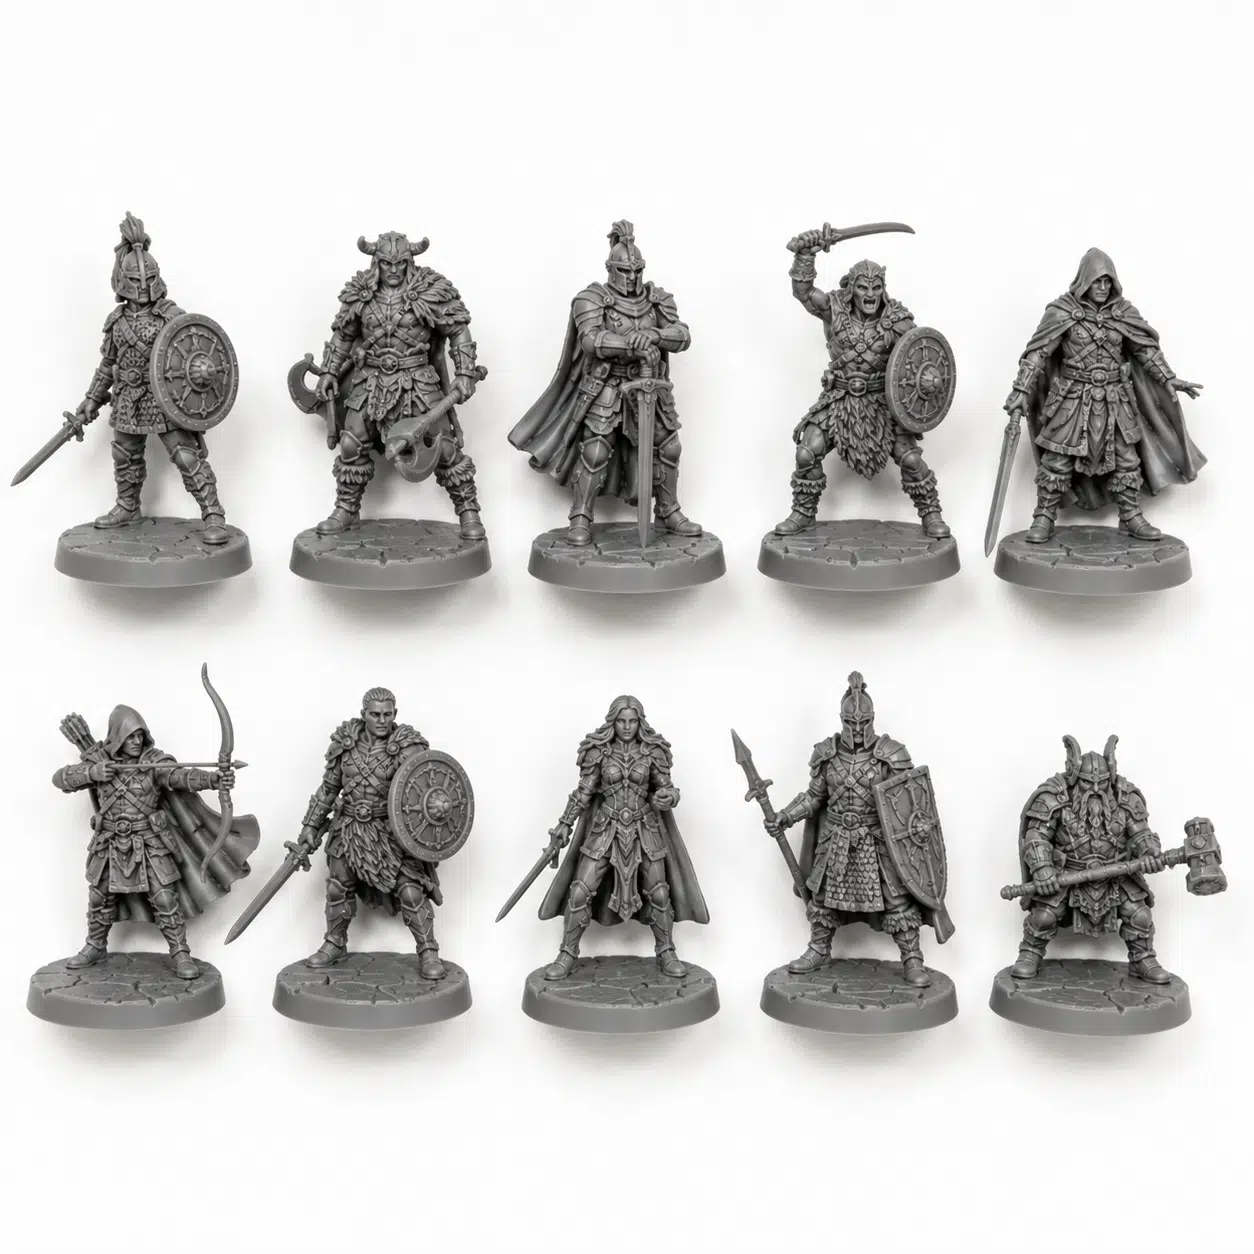
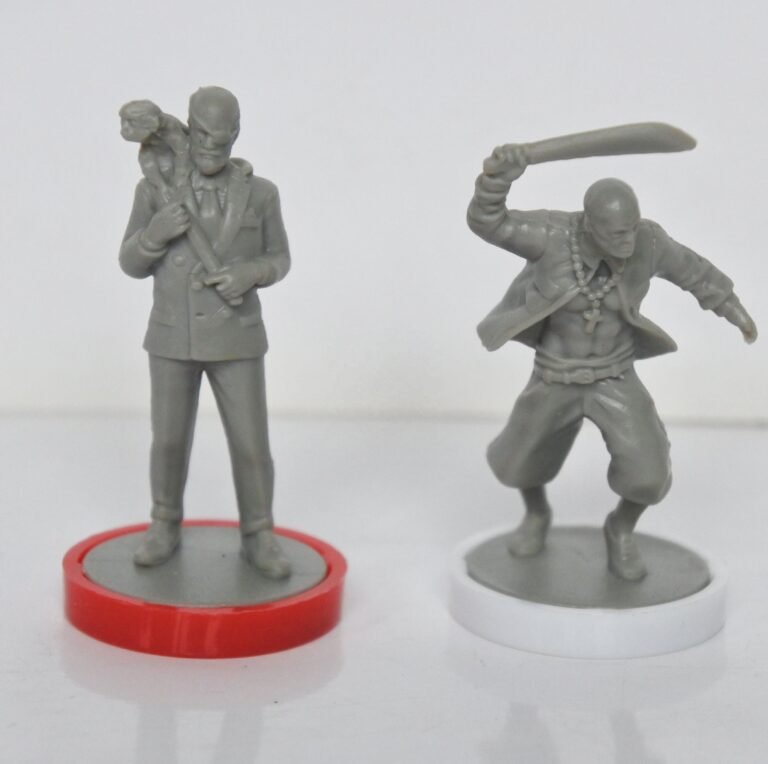
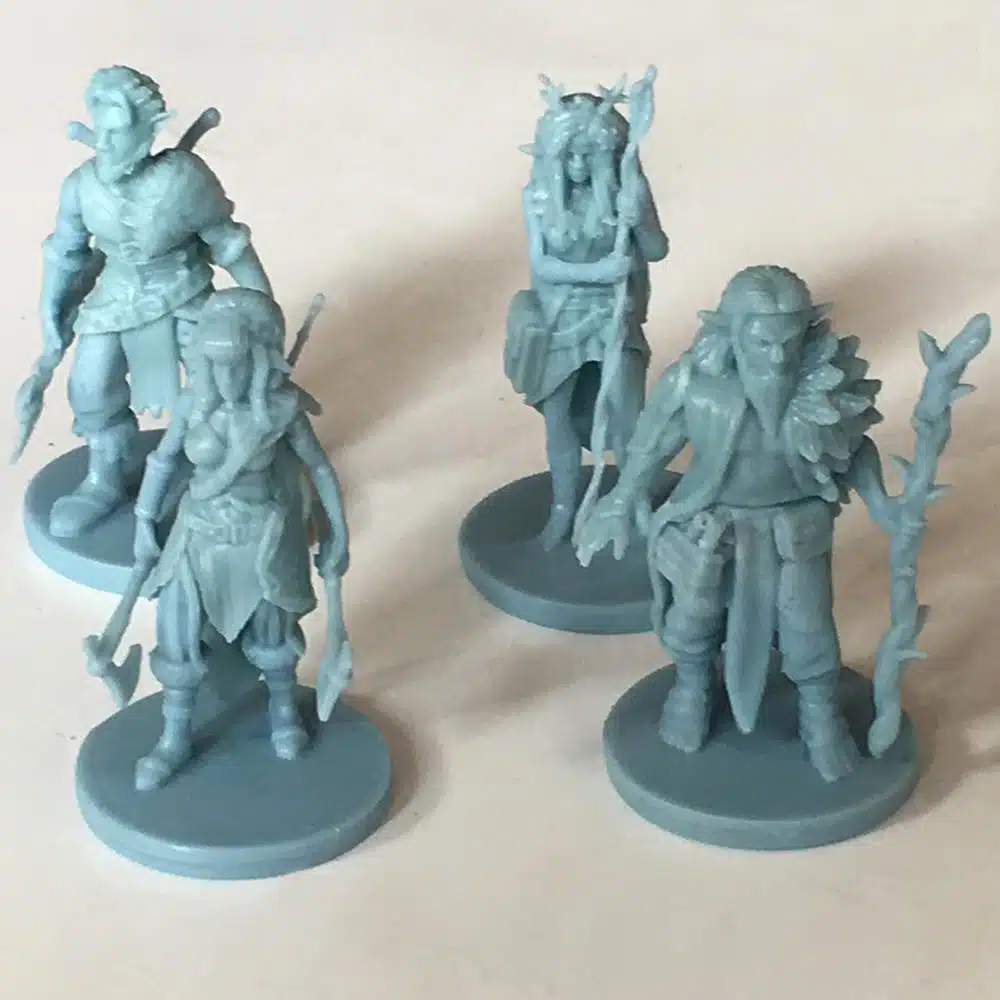
Standard Resin Miniatures
Basic resin figures for tabletop characters and units
Component | Specification | Qty |
|---|---|---|
Miniatures | 28mm Scale | 10 pcs |
Material | Grey Resin | / |
Finish Type | Unpainted | / |
Detail Level | High Detail | / |
Included Accessories | Bases Included | / |
Estimated Quote (1,000 units)
$8 – 25 / set
Lead time: 15-60 days
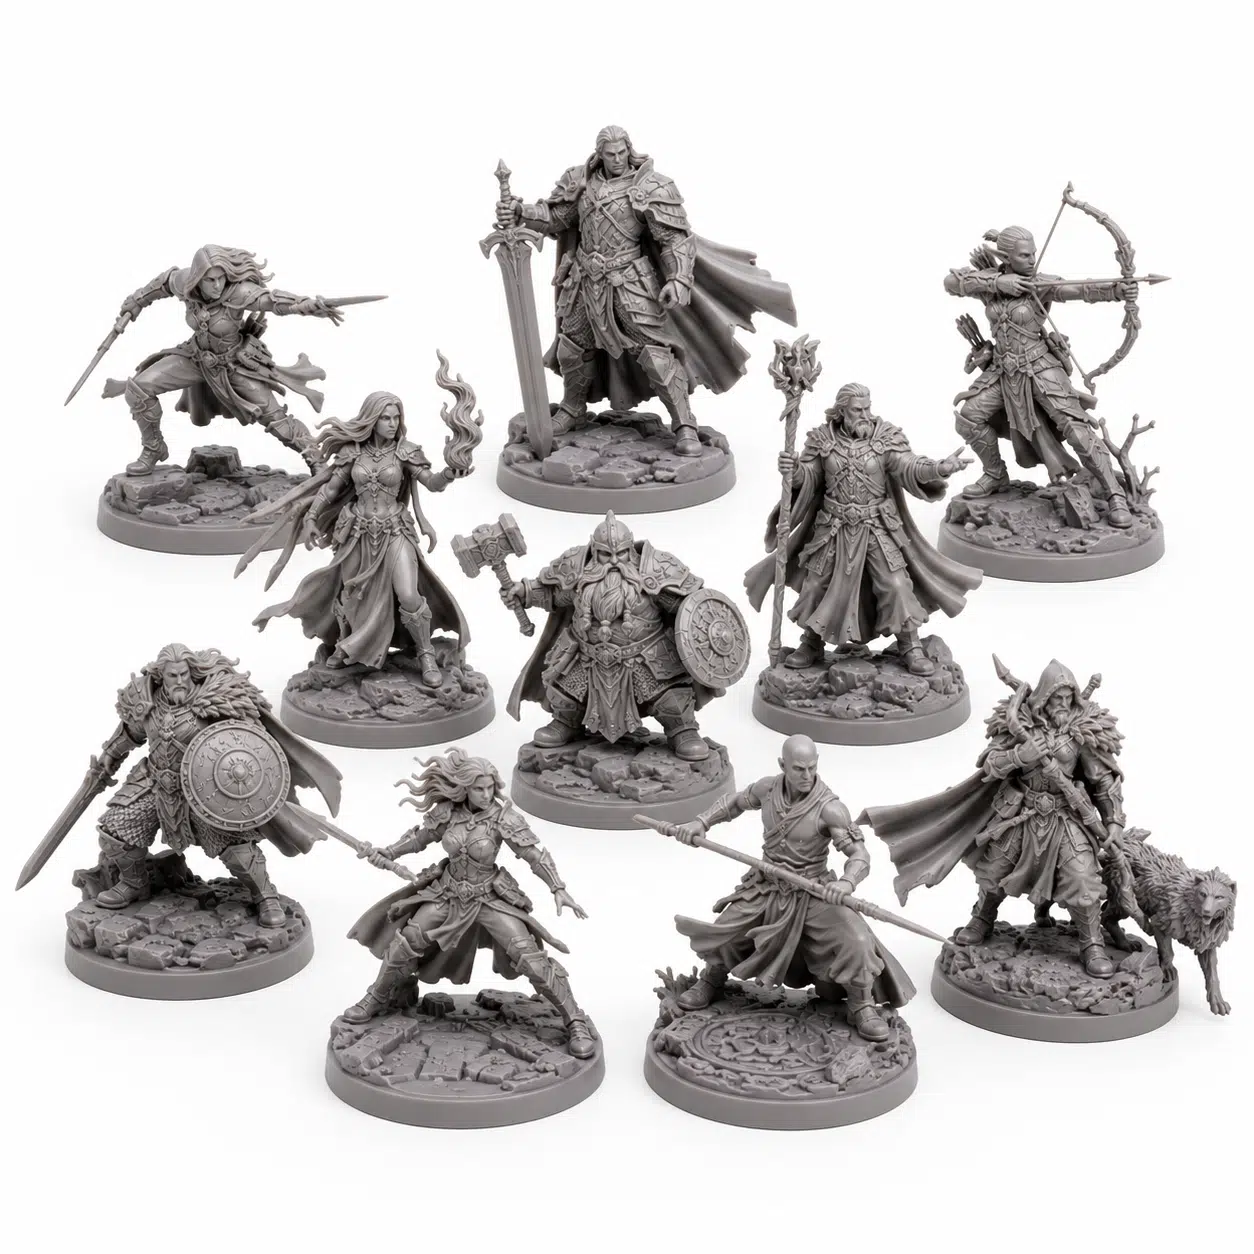
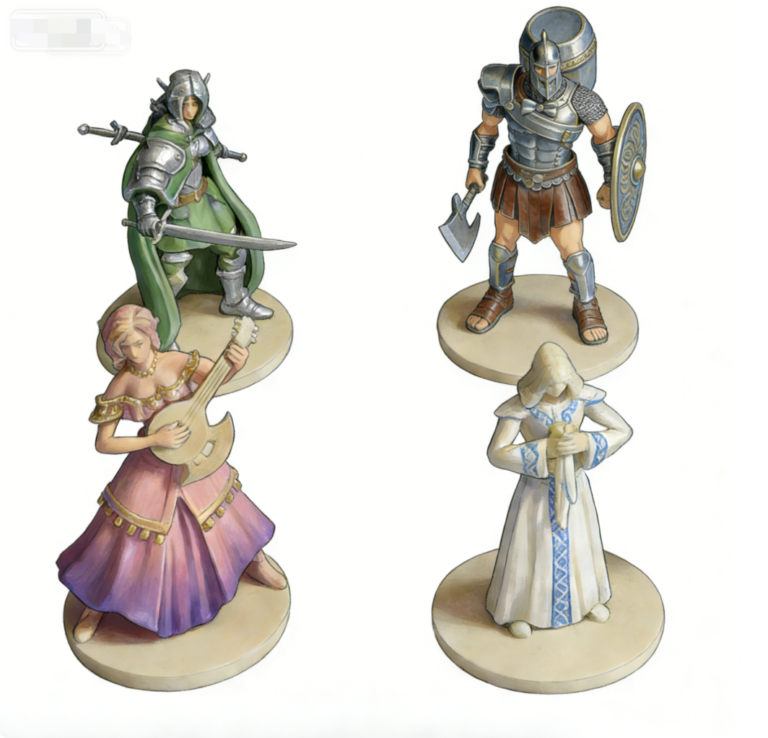
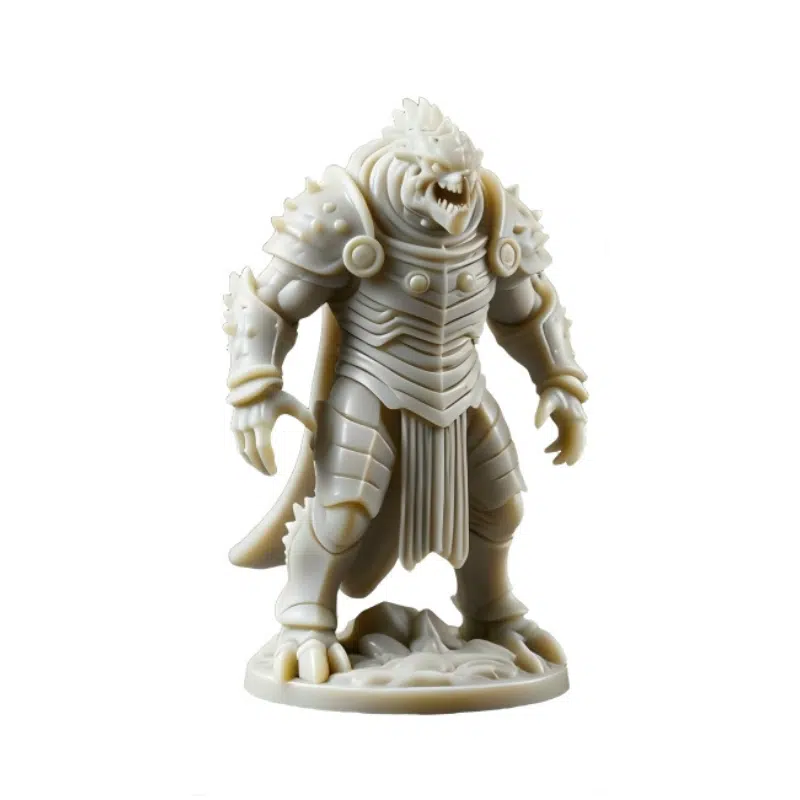
Detailed Hero Miniatures
Highly detailed character miniatures with strong display appeal
Component | Specification | Qty |
|---|---|---|
Miniatures | 35mm Scale | 10 pcs |
Material | High-detail Resin | / |
Finish Type | Unpainted | / |
Detail Level | Dynamic Poses | / |
Included Accessories | Custom Bases | / |
Estimated Quote (1,000 units)
$12 – 35 / set
Lead time: 15-60 days
Understand Your Costs
Deep-dive guides to help you budget, plan, and avoid surprises.
Individual Component Pricing
Need a quote for just one component? Check individual pricing for each sub-service.
Ready to Get Your Exact Quote?
These are estimates. Your game is unique. Send us your specs and we’ll return a detailed, itemized quote within 24 hours.
We Provide All options for Custom Game Miniature
Custom Miniatures Sizes & Scale Standards
Miniature size should be fixed before sculpt details go too far. If scale is decided late, the model often starts fighting production: weapons get too thin, bases become unstable, facial detail disappears, or the figure ends up too large for the box and insert.
We do not choose scale from the render alone. The figure still has to work on the board. If the base eats too much space, the pose makes it easy to tip, or the thin parts break after a few plays, the scale was pushed too far.
Common Tabletop Scale Standards & Measurement Baselines
We support standard and custom miniature scales, but the measurement rule has to be locked first. You have to pick one measurement and stick to it. If you measure one mini to the eyes and another to the top of the helmet, the whole set will look like a mess. You won’t notice it now, but the moment you stand an expansion character next to the original faction, the scale will be totally out of whack.
Industry-Standard Miniature Scales
Measurement Baselines: Eye-Level vs. Total Height
Eye-Level Scaling: For humanoid figures, we usually prefer eye-level measurement. Hair, helmets, horns, or raised weapons can make total height misleading. Eye-level scaling keeps human characters from looking wrong when they stand together.
Total Height Scaling: Total height is useful for monsters, creatures, fixed-pose figures, or display-style pieces where the full silhouette matters. But if it is used across every humanoid character, one helmet or raised arm can throw off the whole scale system.
The measurement rule should be set before sculpt approval. Fixing scale drift after tooling is expensive and usually means reworking the sculpt.
Scale-Driven Engineering Constraints
Small figures cannot carry unlimited detail. Large figures cannot be treated like enlarged small figures. Each scale has its own failure points.
Small scales lose detail first. Faces, fingers, straps, and thin weapons become soft or disappear if the sculpt is too ambitious.
Larger miniatures create different problems. Thick areas can shrink, sink, or warp. Long weapons, banners, tails, and extended limbs need support or they will bend, break, or fail during molding.
If the sculpt has deep undercuts, thin parts, or unsupported shapes, we check those before tooling. Once the mold is made, those problems are no longer cheap to fix.
These engineering checks are part of our complete custom board game manufacturing workflow, ensuring your miniatures integrate cleanly with custom game boards, tokens, and boxes.
Base Integration & Tolerance Management
The base is not just a display part. It decides whether the figure stands, fits the board space, and survives handling.
Integrated Bases: Integrated bases are molded together with the figure. This is usually the safer choice for mass-market board games because there is no extra assembly and fewer loose points that can fail.
Slot-Base & Socket Assemblies: Slot-base or socket structures can work for hobby-style kits or multi-part figures, but the fit has to be checked after painting too. A slot that works before paint can become too tight after coating. If the fit is too loose, the figure wobbles or comes apart during use.
Consistency Across Core Games & Expansions
If the game will have expansions, we keep scale references and approved dimensions on record. Otherwise, the next wave of miniatures can slowly drift away from the first release. That is how a “same character line” starts looking like it came from different games.
Custom Miniatures Materials: PVC, Resin, and ABS
Material is where a miniature project can go wrong very fast. Pick the wrong one, and the problems are not small: thin parts snap, long parts bend, detail turns soft, or the unit cost stops making sense once the quantity goes up. We look at the sculpt first, then choose the material. Doing it the other way around is where projects usually get into trouble.
High-Detail PVC (Polyvinyl Chloride)
PVC is the normal workhorse for mass-market board game miniatures. It is the better direction when the figures need to survive regular player handling, shipping, and repeated use. For larger production runs, this is usually the practical material.
But PVC will not magically preserve every detail from the 3D sculpt. Thin swords, antennae, fingers, horns, and deep undercuts have to be adjusted early. If the sculpt is too thin or too sharp, PVC may bend, soften, or lose definition after molding. Shrinkage and mold direction also need to be handled from the start, or the finished figure will not match the render the client approved.
PVC is the right call when the miniature needs to be durable and produced in volume. It is not the right call if the sculpt depends on extremely sharp resin-level detail with no design adjustment.
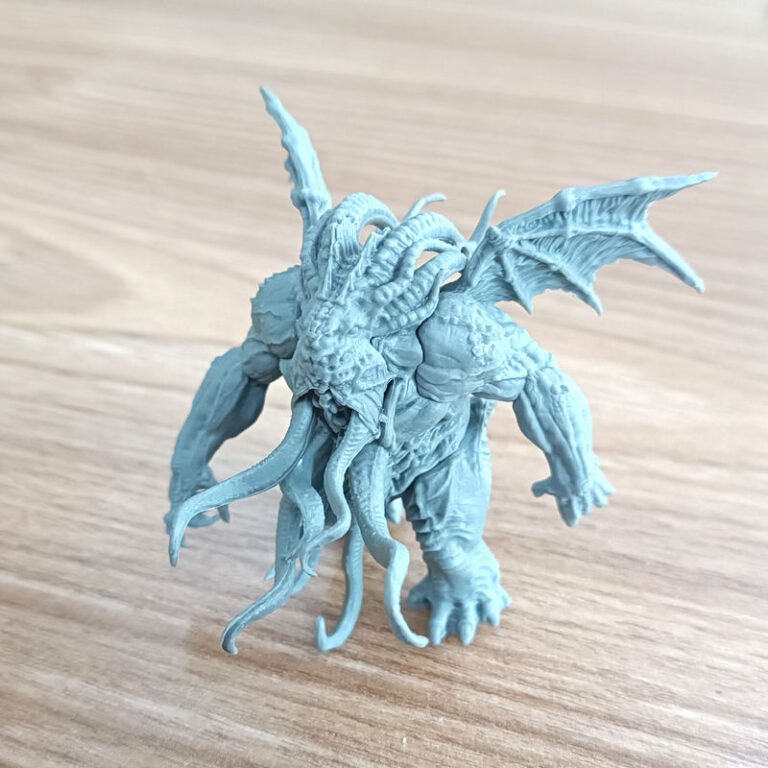
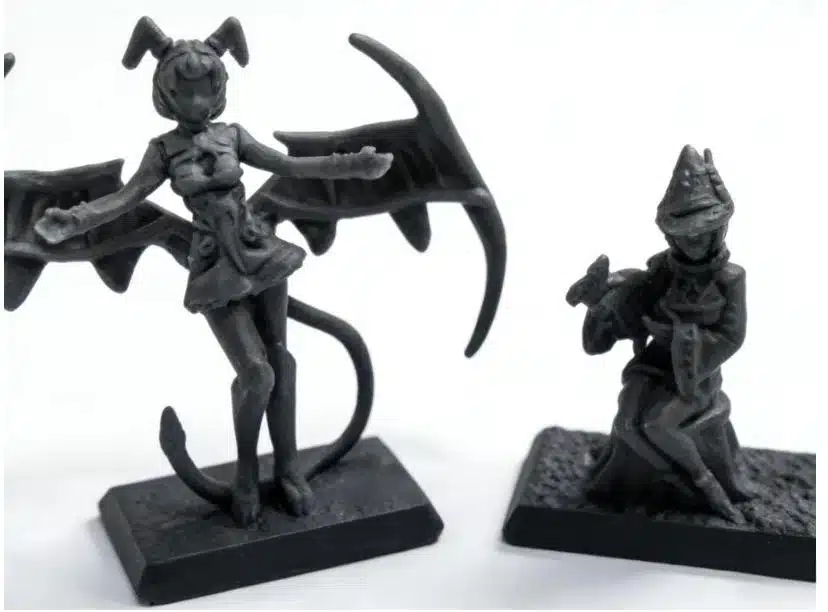
Professional Resin Casting
Resin is for sharp detail and smaller runs. It can hold fine textures, faces, armor lines, and collector-style surface detail much better than PVC. If the project is a boutique release, display figure, prototype, or limited collector piece, resin can make sense.
But resin is brittle. That is the part people underestimate. Thin weapons, fingers, horns, and small extended parts can snap if players handle the figure roughly. It is not the material we would push for a family board game where pieces are tossed into trays, handled by kids, or used heavily over time.
Resin works when detail matters more than rough handling. If the figure needs to survive mass-market gameplay, resin is usually a risky choice unless the sculpt is designed around its weakness.

ABS (Acrylonitrile Butadiene Styrene)
ABS is used when the project needs harder, sharper plastic parts, often for sprue-based hobby miniatures, modular kits, or assembly-style products. It can hold clean edges and firm part shapes, which is useful for tactical games or hobby products where players expect assembly and painting.
But ABS is not a casual upgrade. Tooling is more demanding, part design needs to be more disciplined, and the material is less forgiving under bending. Thin connectors, clips, and small parts can crack if the design is wrong. ABS also makes less sense for young-player games or rough-handling products where flexibility is needed.
We use ABS when the miniature is closer to a hobby kit than a soft board game figure. If the product is meant for broad retail handling, PVC is usually the safer place to start.
Custom Miniatures Color & Surface Finishing
Color finishing should be decided after we know the production volume and how the miniature will be used. Do not choose color treatment from the sample photo alone. A hand-painted sample can look good, but once the quantity goes up, every extra color becomes labor cost. Molded color is easier for mass production, but it will not give you facial detail, armor shading, or small painted effects. If the finish choice is wrong, the figure either becomes too expensive to produce or starts looking worn after normal handling.


Hand Painting
Hand painting only makes sense when the paint is actually selling the figure. We use it for collector pieces, limited runs, prototypes, or premium editions where plain molded plastic would make the sculpt look unfinished. Faces, armor, cloth folds, weapons, and small raised details can all come out better with paint, but every extra color has to be paid for in labor.
But hand painting is slow and expensive. Every extra color, wash, highlight, or small detail adds time. If a project has hundreds of thousands of pieces, full hand painting usually becomes the wrong direction very quickly. If the figure needs paint, surface prep also matters. A proper primer for miniatures helps paint grip the surface. Without it, a sample may look fine at first, but high-touch areas can start rubbing off after normal handling.
We use hand painting when the figure value justifies the labor. For standard mass-market board games, we usually keep painting simple or use molded color instead.
If the sculpt needs more depth, washes or simple shading can be added, but every extra step adds labor and makes consistency harder across large runs.
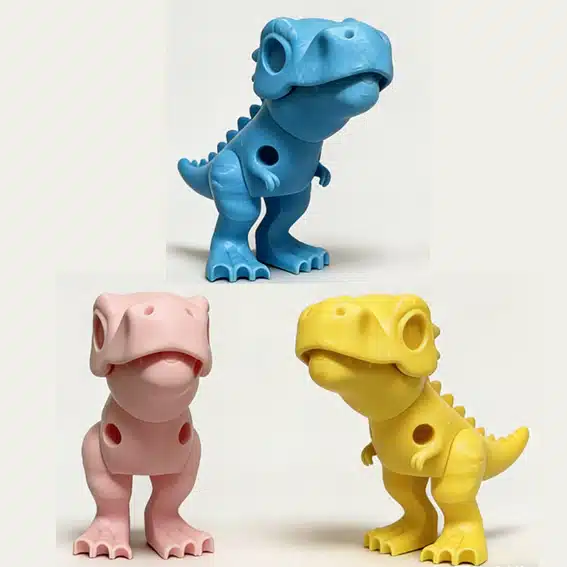
Solid Color Injection & Material Tinting
Solid-color injection is the practical choice for high-volume board game miniatures. For solid-color figures, the color is already in the plastic. Edges will not chip like painted parts, and high-touch areas are easier to control. For large board game runs, this is usually the practical route when the figure does not need detailed painting.
The color is usually made with injection molding colorants mixed into the material, not painted on the surface. If the game needs player colors or faction colors, Pantone matching should be locked early. Pantone Solid Coated can be used as a color reference, but molded plastic will not look exactly the same as printed paper or a screen preview. We normally confirm the real molded color sample before mass production.
But molded color will not create detail by itself. If the sculpt is weak, solid color will make that weakness more obvious. A plain figure with poor surface detail can look cheap very quickly. Color matching also needs to be locked early, especially when different factories, batches, or expansion waves need to match the original set.
Material tinting works well when the game needs clear player colors, faction colors, or simple character separation. It is not a substitute for painting if the miniature needs realistic skin, armor, or detailed visual storytelling.
Custom board games possess
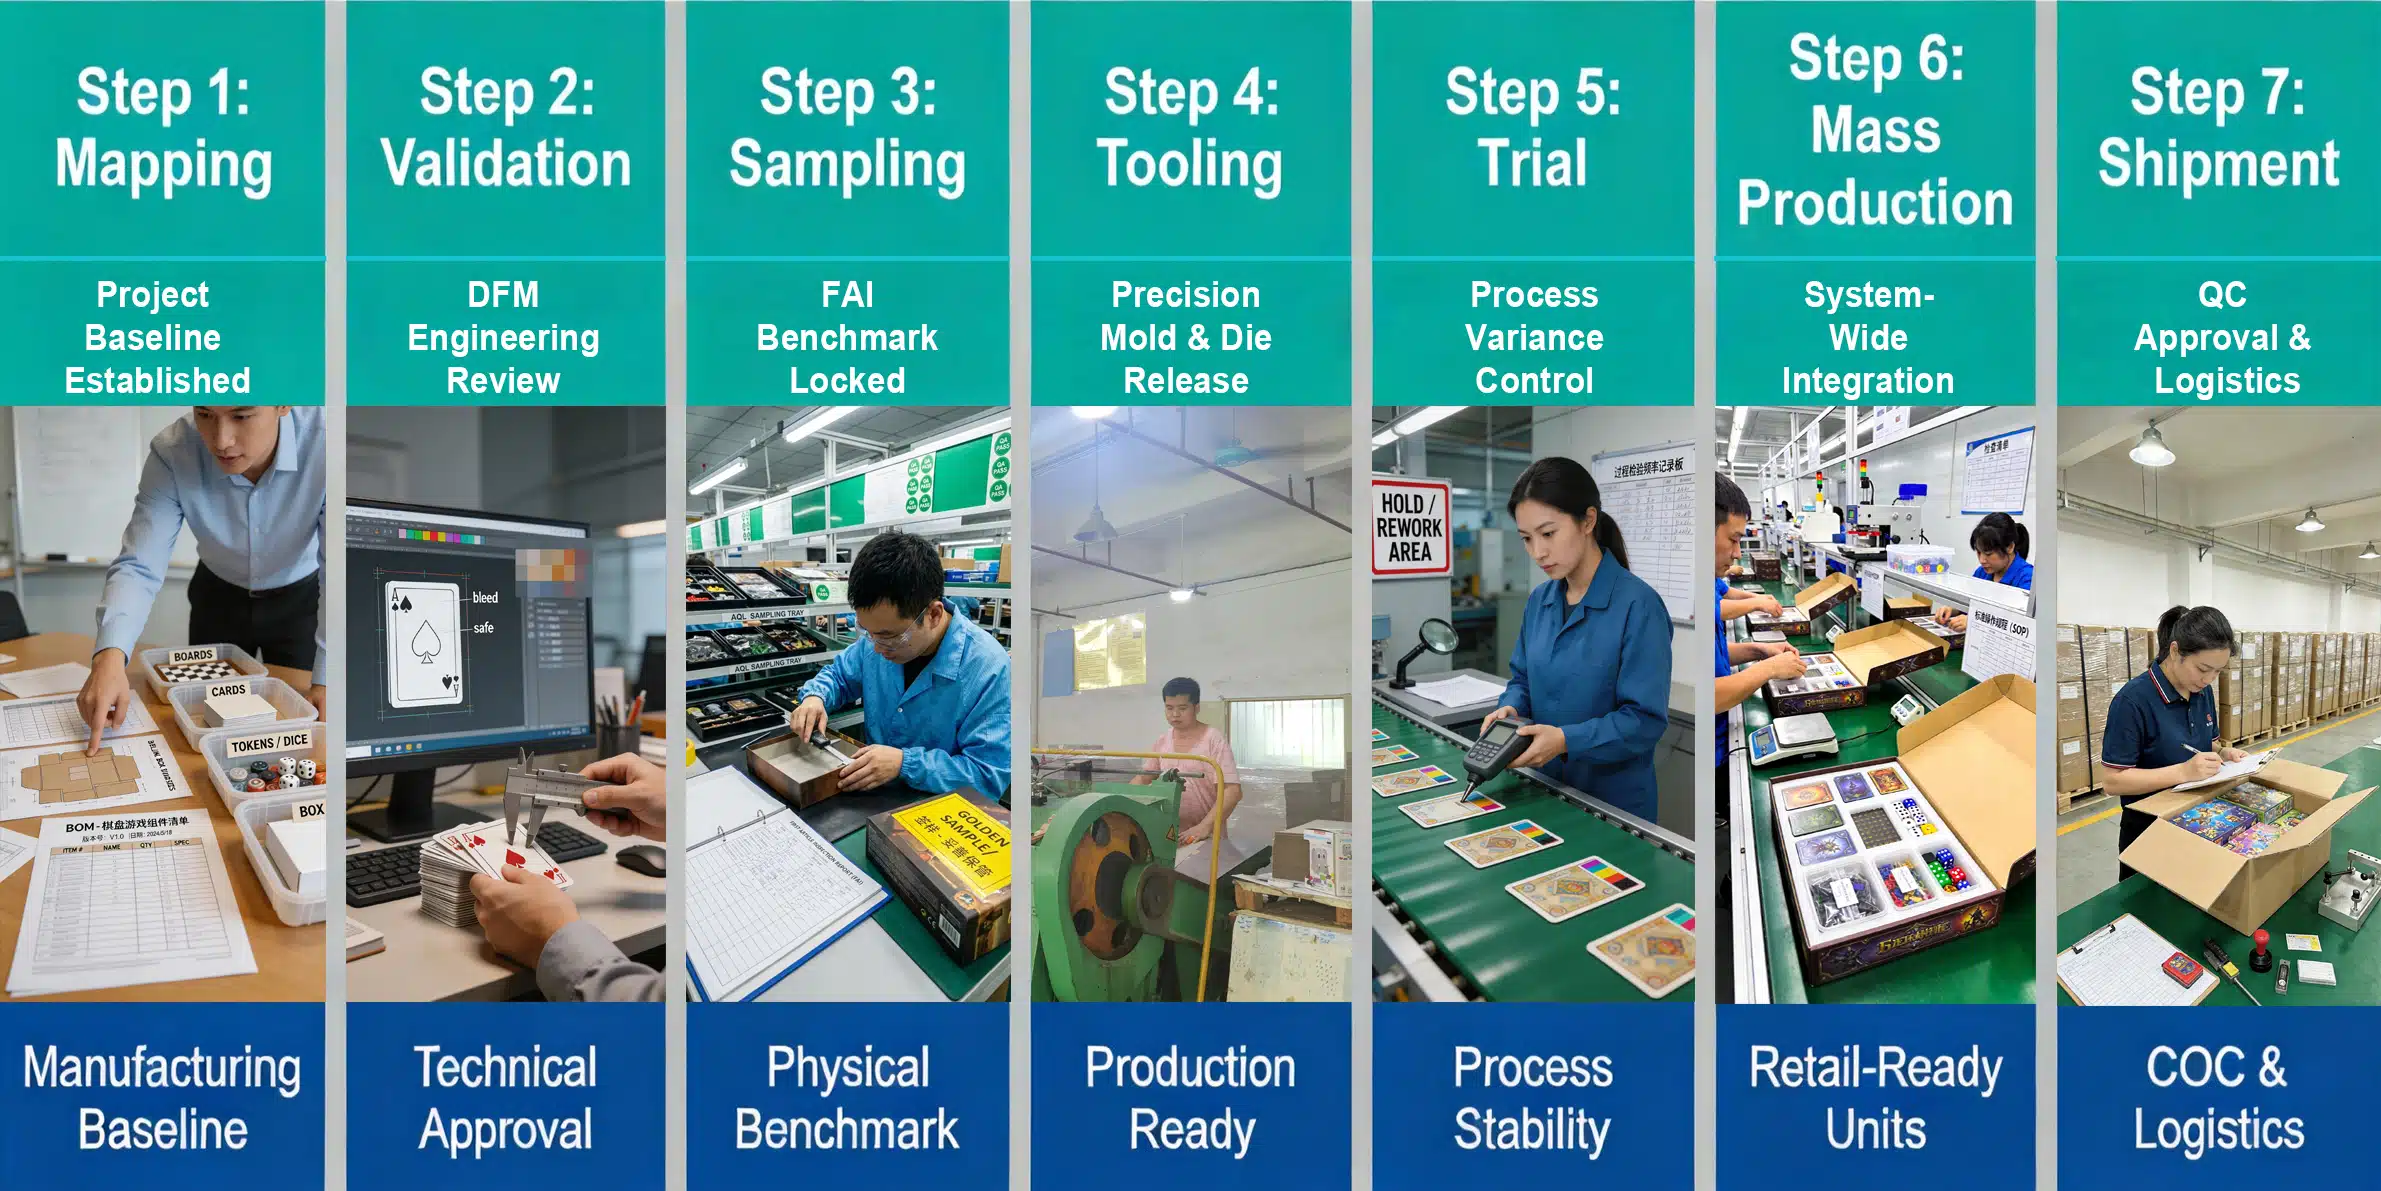
At Funway, we do not run a board game project as a stack of separate parts. A change to the board often affects the box. A box change may force the insert to move. File setup can also create problems later if it does not match the real component build. So we sort the job in a fixed order: component mapping first, then engineering review, then sampling and first-article approval, then tooling, trial production, mass production, and final inspection before shipment. That order is what keeps the project buildable, not just presentable in the files.
We also do not treat manufacturing as something that starts after design is “finished.” Structure, fit, materials, tooling, and packing are checked while changes are still manageable. It is much better to catch a problem at validation or sampling than after dies are released or units are already on the line. That is how we keep rework down, hold production more steady, and move from prototype to mass production without avoidable surprises.
Prototyping & First-Article Inspection (FAI)
A miniature should not move from a nice-looking 3D sculpt straight into steel tooling. That is where expensive mistakes usually start. Before the mold is cut, we need to see the sculpt as a physical part. Thin weapons, fingers, horns, or tails may look fine in the file but fail once handled. Small surface textures may disappear at tabletop scale. Deep undercuts can force ugly parting lines or weak mold areas. These are not problems we want to discover after steel tooling has started.
Before any steel tooling investment is made, we use a two-step validation path: first the high-resolution 3D master, then a soft-mold PU sample when the project needs a closer production feel. The 3D file is not treated as final just because it looks good on screen.
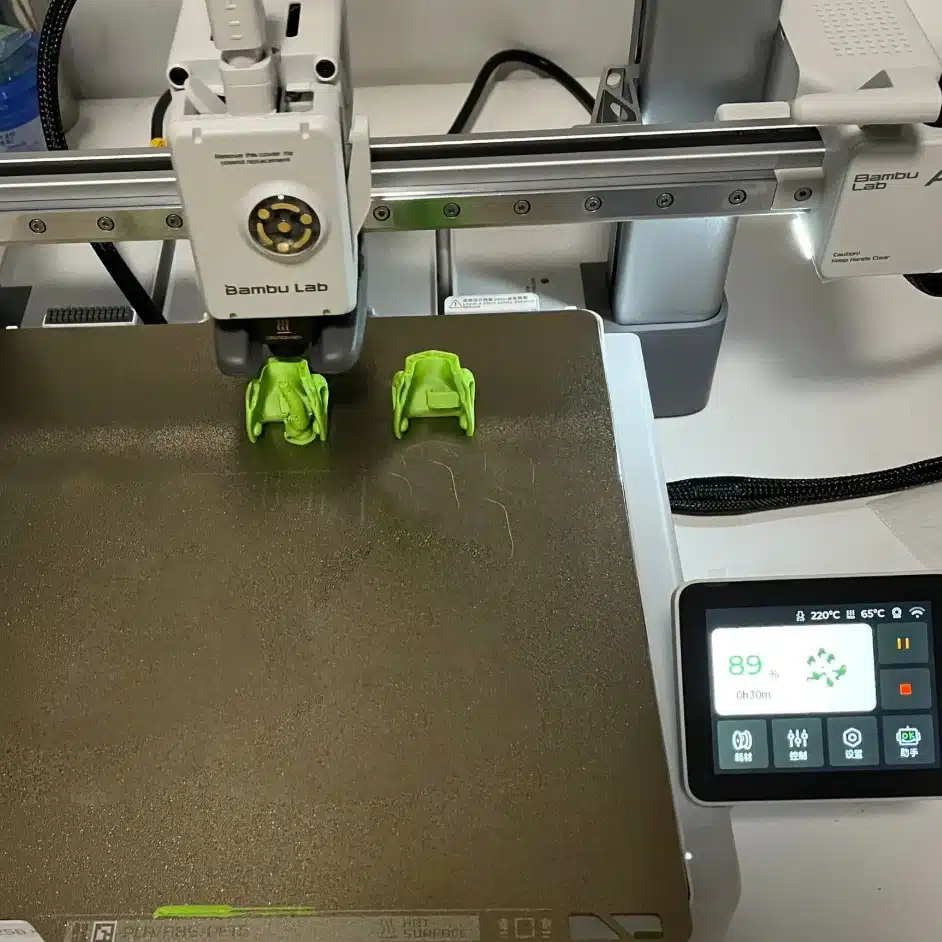
High-Resolution 3D Master Prototypes
We first produce physical master prototypes using SLA (Stereolithography) or DLP (Digital Light Processing) 3D printing. These processes cure liquid resin layer by layer, with typical layer resolution around 25–50 microns. That gives us a real part to check before the project moves into tooling.
At this stage, we look closely at the details that usually cause trouble later:
Facial expressions and micro-surface textures
Chainmail, armor edges, and organic sculpt transitions
Thin or high-risk elements such as weapons, fingers, horns, tails, and extended limbs
These master prototypes become the locked reference geometry for the next validation steps. If the sword is already too thin, the face is too soft, or the pose makes the figure unstable here, we fix it before the cost moves into steel mold work.
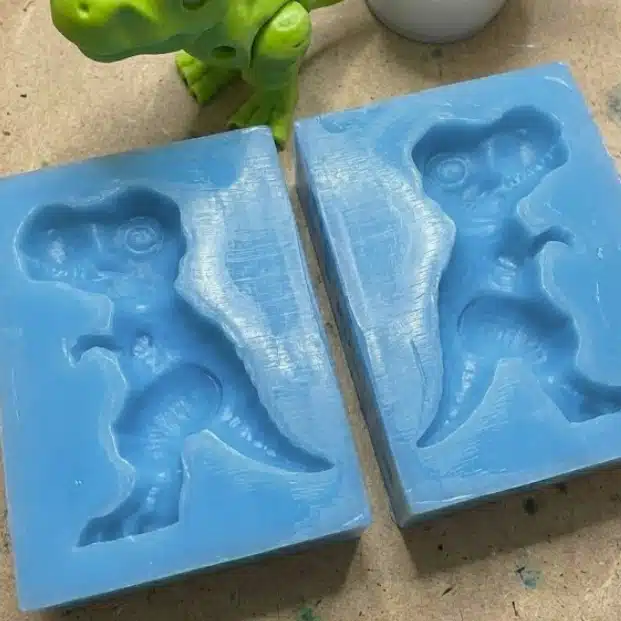
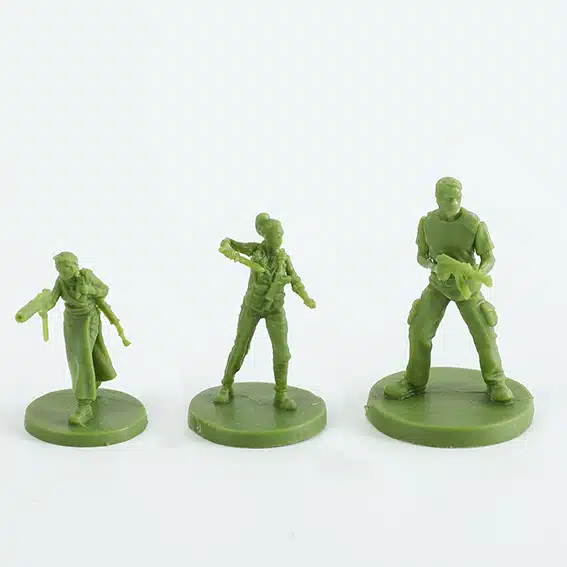
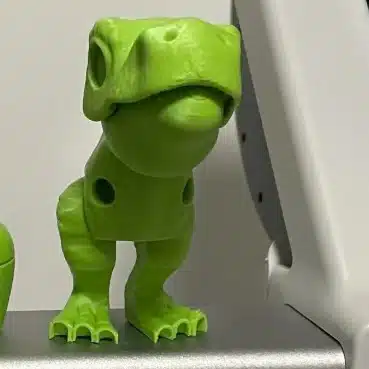
Silicone Soft Mold & PU Casting Samples (Production-Feel Validation)
For premium miniatures, large figures, Kickstarter deluxe tiers, or multi-part pieces, a 3D printed master is often not enough. Approved masters can be used to make a silicone soft mold, and then PU casting samples are produced from that mold.
This step gives a better feel for the part outside of raw resin printing. It helps publishers check:
Real-world part weight and hand feel
Structural balance and center of gravity
Assembly logic for multi-part miniatures
Surface behavior under priming and paint application
A PU sample is not the final PVC, ABS, or HIPS part. It cannot replace a tooling sample. But it does show problems that a raw 3D print often hides. You can feel the weight, check whether the pose stands properly, test how multi-part assembly works, and see whether primer or paint starts exposing surface defects. For premium miniatures or large figures, this step is usually worth doing before steel tooling money is spent.
Design Lock Before Tooling Investment
Once both the 3D master prototype and PU casting sample are approved, the sculpt should be treated as design-locked. This is important because changes after tooling are no longer small changes.
Design lock means:
No major dimensional or structural changes should be made after tooling starts
Steel mold investment can move forward with lower revision risk
Downstream T1–T3 tooling samples are expected to stay within the approved dimensional direction
This step helps avoid the worst kind of delay: discovering after the mold is cut that the weapon is too weak, the parting line is ugly, the base does not sit flat, or the painted surface no longer matches what was approved in the digital sculpt.
T1–T3 Production Pulls: Once the industrial steel molds are completed, we produce T1 samples directly from the actual production tooling, using the final specified material such as PVC, ABS, or HIPS.
This is where the mold starts telling the truth. A resin print or PU sample can still hide problems, but a T1 production pull will not. Once the part comes out of the actual steel mold in the final material — PVC, ABS, or HIPS — shrinkage, parting lines, ejector marks, mold flow, and assembly fit all become visible.
At T1 stage, we check:
Material shrinkage and scale compensation
Parting line placement and visibility
Ejector pin positioning and surface impact
Wall thickness consistency and mold flow
Surface detail after real production pull
Fit and alignment for multi-part assemblies
If T1 exposes a weak sword, a soft face, a bad ejector mark, uneven shrinkage, or a joint that does not close cleanly, we do not treat it as a small cosmetic issue. That is the kind of problem that gets worse in mass production, not better. It needs to be corrected before approval.
If needed, the mold is adjusted and checked again through T2 and T3 samples. We only move forward when the miniature is stable in the real production material: the size is right, the surface detail holds, the parting line is acceptable, and the assembly still works after molding. That is the point where mass production becomes safe to start.
Mass Production & Quality Control

Once the FAI sample is approved, mass production should follow that approved sample, not the original render. The approved sample becomes the reference. If the factory keeps chasing the digital sculpt after that point, the run can start drifting.
Injection Molding Control
For PVC or plastic miniatures, molding has to stay stable across the run. If pressure, temperature, cooling, or cavity balance moves too much, the result shows up fast: soft detail, short shots, deformation, or parts that no longer assemble cleanly.
Assembly & Bonding
Multi-part miniatures are where small shortcuts show up fast. A joint may look fine in the approved sample, but if the contact area is too small, or the part is pulling against the glue line, it can crack loose after a few plays. We check whether the parts seat properly, whether the bond has enough area to hold, and whether the finished figure can be picked up, dropped into the tray, and handled like a real game piece before it goes into packing.
In-Line Inspection
Miniature QC cannot wait until the end. We check during production for visible deformation, missing detail, rough parting lines, unstable bases, color issues, and assembly defects. If these are only found after packing, the rework cost is much worse.
Compliance Checks
For board game and tabletop products, materials can be checked against the required market standards, such as EN71 for the EU or ASTM F963 for the US, when the project needs children’s product or retail compliance support.
Factors Influencing Unit Cost
Miniature cost usually gets out of control before mass production even starts. The expensive decisions are often already inside the sculpt: undercuts, thin parts, part count, material choice, scale, and whether the figure needs painting or assembly.
Tooling Complexity & Mold Engineering
Deep undercuts, crossed arms, capes, weapons, horns, tails, and complex silhouettes all make the mold harder. Every extra slide, insert, or mold split adds cost. If the sculpt ignores molding direction, the figure may look good in the render but become expensive or unstable in tooling.
Part Count, Assembly & Labor Intensity
A single-piece miniature is usually the cleanest route for mass-market board games. Once the figure is split into multiple parts, cost starts moving: more molds, more assembly, more bonding checks, more alignment risk.
Multi-part figures make sense when the pose or detail truly needs it. If the split is only there because the sculpt was not designed for production, the project pays for that mistake later.
Scale, Weight & Material Consumption
Larger miniatures use more material and take more space in the box. They also need more control around wall thickness, shrinkage, and base balance. A 35 mm figure and a 28 mm figure are not just different heights; they can change material use, packing density, tooling cost, and freight.
Heavy figures may feel better in hand, but they also raise material cost and shipping weight. If the scale is pushed too far, the miniature can become the reason the whole game box gets larger.
Production Volume
We support low-volume production, but the tooling amortization doesn’t change. The mold must still go through a complete cycle of machining, sampling, and adjustment before the geometry is stabilized. For low-volume runs, resin or soft tooling may make more sense. For larger runs, PVC or plastic molding usually becomes more practical because the tooling cost can be spread across more units.
Cost Control Before Tooling
The best time to reduce cost is before tooling. Once the mold is made, most savings become painful: removing detail, changing part splits, reducing material, or accepting a weaker result.
We usually look for cost savings early: simplify risky undercuts, thicken weak parts, reduce unnecessary assembly, choose the right material, and keep the scale practical. That protects the miniature better than trying to force a cheaper price after the sculpt is already locked.
FAQs about Custom Miniature
Related Blog


Contact
Launching a custom board game can be a complex and challenging process, involving dozens of decisions. We’re committed to making your board game design, printing, and manufacturing process as easy and convenient as possible. But if you have any further questions, please feel free to contact me.
We’re happy to answer all your questions about custom board game printing and manufacturing and can provide you with a quote tailored to your requirements without any obligation. Feel free to contact us—we’re always here to help!