
How to Make a Game Box at Home: DIY Custom Game Box with Greyboard
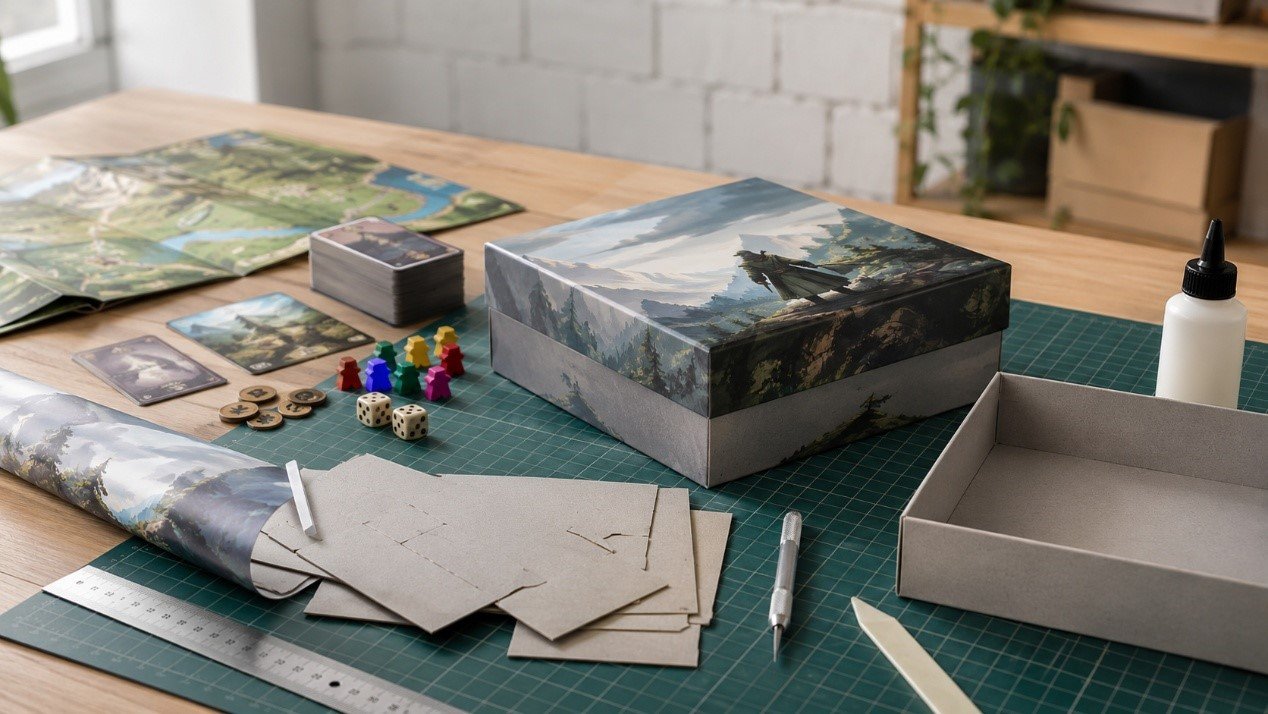
Handmade DIY custom game box made with greyboard and printed wrap paper on a board game prototype workbench
For many independent game designers, the first real box is not made in a factory. It is made on a desk, with greyboard, printed cover paper, a knife, glue, and probably one corner that does not close perfectly.
It is normal.
A DIY custom game box is not for competing with a retail box that factory made. It solves a different problem: you need something physical enough for playtesting, publisher pitching, Instagram photos, Reddit feedback, or a Kickstarter preview before you pay for factory sampling and mass production.
But many designers start in the wrong place.
They search for a Print and play box template, drop the artwork into the dieline, and only later realize the card stack is too thick, the folded board does not fit, or the lid cannot close cleanly.
That order is backwards.
A game box should not begin as a graphic design file. It should begin as a fit decision. Cards, boards, tokens, dice, rulebooks, and inserts decide the box first. Artwork comes later.
This guide explains how to make a game box at home using greyboard and printed wrap paper, but it also shows where the handmade method stops being reliable. That boundary matters. A handmade prototype can help you sell the idea, but it can also create false confidence if the size, lid depth, wrap paper, and component stack are wrong.
Do Not Download a Box Template First
Most prototype box problems happen before cutting starts.
The failure point is usually not the glue, the knife, or the printer. It is the decision order.
The better sequence is:
This is the same box-fit logic used in board game manufacturing, only simplified for home production.
A free box template is useful only after you know what the box needs to hold. Before that, the template is just a nice-looking trap.
A box is bought from the outside, but it usually fails from the inside.
Step 1 — Lock the Component Stack
Before designing the box, build the actual component stack.

Measuring board game components with cards, board, tokens and rulebook before designing a DIY custom game box
Do not estimate only from the spreadsheet or artwork file. Place the real or mocked-up components together:
The handmade box does not need factory precision, but it does need a realistic height check. A card deck that looks thin in a file becomes a different object once it is stacked, wrapped, and placed beside a folded board.
For a home-made prototype, add clearance early. Around 2–3 mm extra space on length and width is usually safer than a tight fit. For height, be even more careful. If the lid touches the tallest component, the box may still close on day one, but it will feel wrong after repeated opening.
This is where many DIY custom game box prototypes fail: the outside looks good, but the lid drags, the corner lifts, or the box bulges slightly. In photos, that may be invisible. In the hand, it feels unfinished.
A simple decision rule:
Factory boxes must consider packing speed, carton efficiency, shipping safety, and repeatable lid fit. A handmade box only proves direction.
Step 2—Choose the Appropriate Box Structure
There are three kinds of box DIY custom game box: tuck box, lid and base box, sleeve box.
A tuck box is the easiest option for card-only games, small print-and-play decks, and lightweight prototypes. But it is not a good structure for heavy dice, folded boards, wooden pieces, or tabletop games. The flap wears first, and the side panels can bow if the contents are too dense.
A lid and base box is usually the better choice for board game prototypes. It is slower to make by hand, but it gives the game a stronger tabletop presence. If your game has cards plus a board, tokens, dice, or multiple paper components, this is normally the structure worth building.
A sleeve box can look clean for small card games, but it is less forgiving. If the sleeve is too tight, it scrapes the artwork. If it is too loose, the product feels cheap. At home, where cutting and folding are not perfectly consistent, sleeve boxes often become annoying faster than expected.
For most independent board game prototypes, my recommendation is direct:
Use a tuck box for card-only PnP games.
Use a lid and base box for board game prototypes.
Use a sleeve only if you can test the blank structure first.
Do not design beautiful sleeve artwork before checking the slide fit. The sleeve does not care how good the illustration is.
Step 3 — Use Greyboard, But Do Not Choose It Blindly
Greyboard is the practical choice for a handmade board game box because it gives thickness and rigidity without industrial equipment.
For home use, the useful range is usually:
Do not choose the thickest greyboard just because it sounds more premium.
This is a common prototype mistake. Thicker greyboard is harder to cut, harder to wrap cleanly, and less forgiving at the corners. If your knife, ruler, or cutting mat is not stable enough, a 2.5 mm board can make the whole box look rougher, not better.
For most home-made board game boxes, 1.5–2.0 mm greyboard is the safer range.
Factory production can handle thicker board because cutting, mounting, wrapping, and corner forming are controlled by equipment. At home, your hand tool is the limit. That is not a weakness. It is the real design-stage constraint.
Step 4 — Use Printed Wrap Paper, Not Thick Photo Paper
The outer artwork should usually be printed on flexible wrap paper, not heavy photo paper.
Many designers print the box cover on glossy photo paper because the color looks rich. Then they try to wrap it around greyboard and the corners become bulky, cracked, or spring open.
That is why retail rigid boxes normally use printed wrap paper mounted over greyboard. The structure and the artwork are separate layers.
For DIY use, choose paper that can fold around the edges without fighting back. A 157–200 gsm coated paper or good matte inkjet paper is usually easier to handle than thick photo paper.
The paper needs three things:
Spray adhesive can work, but test it first. Some inkjet prints react badly with adhesive. Some papers show glue patches after drying. Some glossy surfaces look fine at first and then lift slightly around wrapped edges.
Photo vs. Pitch
If you only need one prototype for internal playtesting, small glue marks may not matter.
If you need photos for Instagram, Reddit, or a publisher pitch, they matter a lot.
Step 5 — Build a Blank Box Before Adding Artwork
This step feels slow, but it saves time.
Make one blank box from greyboard first. No artwork. No final cover. Just the structure.
Check:
This is the prototype version of production sampling.
In factory work, we do not trust a box size only because it works in the dieline. We check physical fit. For home-made boxes, the same logic applies.
A blank box tells you the truth earlier than a beautiful printed box.
If the blank box fails, resize it before artwork. If the printed box fails, you have to fix both structure and design. That is bad budget lock-in, even at prototype scale.
Basic Build Method for a Lid and Base Game Box
For most board game prototypes, the lid and base structure is the most useful DIY method.
Start by measuring the internal size. Place all components in the layout you expect inside the box. Measure length, width, and height, then add clearance. Do not make the box perfectly tight. Tight handmade boxes usually look good empty and feel bad when packed.
Next, cut the greyboard panels. You need a bottom panel, four side walls for the base, a top panel, and four side walls for the lid. Cut with several lighter passes instead of forcing one deep cut. Heavy pressure can crush the edge and make the box look rough.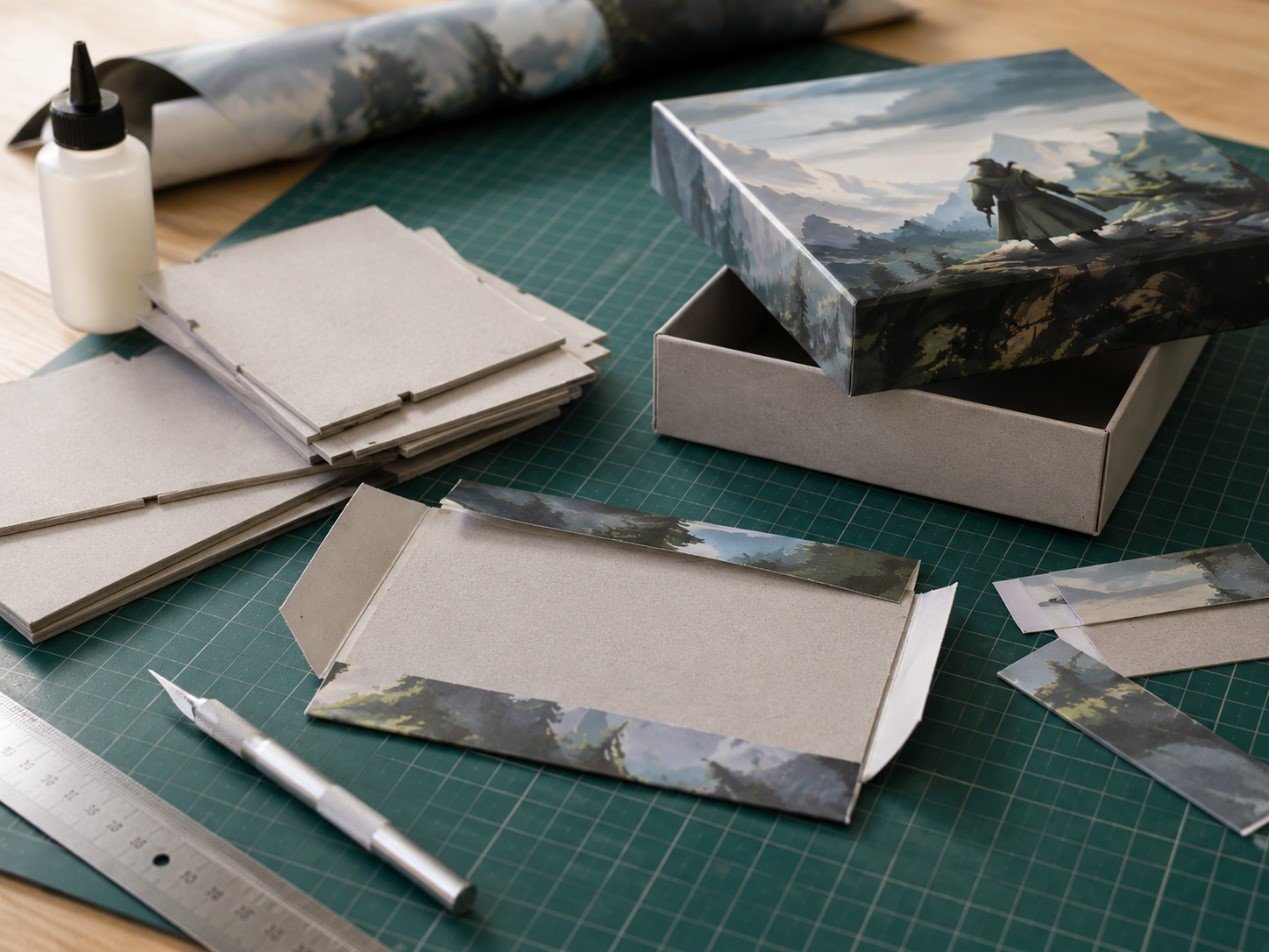 Greyboard panels and printed wrap paper being cut and wrapped to make a handmade lid and base game box
Then prepare the printed wrap paper. Print the artwork larger than the greyboard area so it can wrap around the edges. Do not put important text too close to the side edges. Handmade wrapping is not accurate enough for that.
For factory dielines, 3 mm bleed is a common starting point. For home wrapping, think more generously. The paper must cover the edge and fold inside. If your cover artwork has a thin border, that border will expose every small cutting error.
This is why many board game boxes avoid thin border frames near the edge. It is not only a style decision. It is a production-risk decision.
When gluing, use less glue than you think. Too much adhesive causes warping, wet patches, or uneven paper texture. A smoother result usually comes from even pressure and longer drying time, not more glue.
Corners are where the box quality is decided. If the corner overlap is too thick, the lid will look homemade immediately. If you cut too much away, the greyboard edge may show.
There is no perfect formula here because paper thickness, adhesive, and greyboard thickness change the result. Make one corner test before wrapping the final box.
This is also why a handmade prototype cannot fully predict mass production. A factory uses different glue, pressure, paper handling, and corner forming. Your prototype can confirm size and visual direction, but not final production finish.
Free Print and Play Box Template Download Advice
A free Print and play box template is useful only if it matches your structure and component thickness.
Do not use one universal template for every game. A 54-card microgame, a 108-card party game, and a board game with tokens are not the same box problem.
A useful template should define:
For tuck boxes, the most important variable is deck thickness. For lid and base boxes, the most important variable is internal clearance. For sleeve boxes, the most important variable is slide fit.
If you provide or download a template, also use a measurement worksheet. This is often more useful than the dieline itself.
Ask:
A template brings traffic.
A measurement worksheet brings better project decisions.
That is the part many free download pages miss.
Cover Art Tips for Instagram and Reddit
A handmade box often needs to do one job before anything else: look real enough online.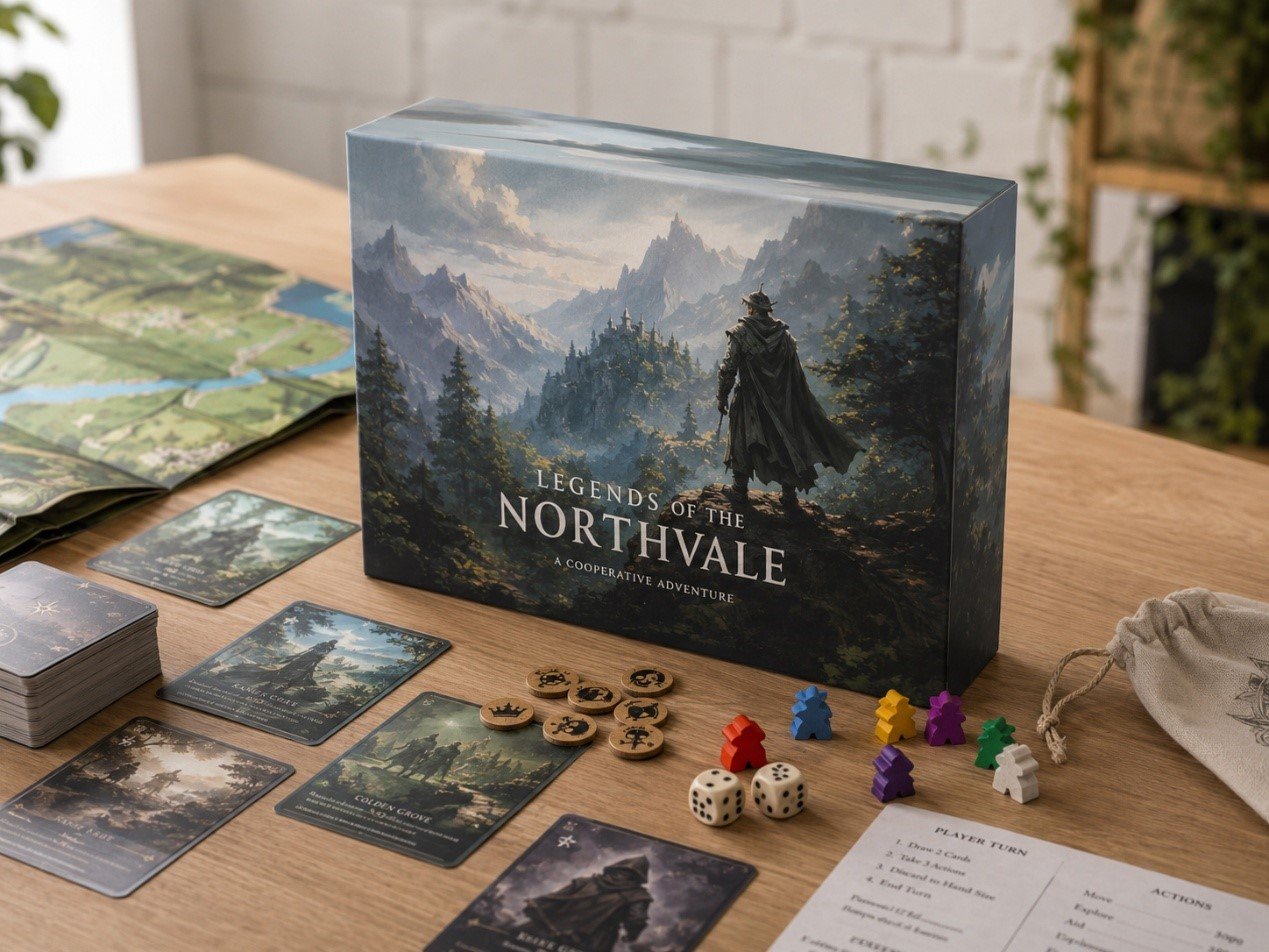 Finished handmade board game box prototype with cards, dice, tokens and board arranged for Instagram and Reddit photos
For Instagram and Reddit, cover art should not be designed like a flat poster. It should be designed for a small phone screen, angled photos, cropped previews, and fast scrolling.
The usual mistake is putting too much of the game world on the cover.
That may look rich on a desktop monitor. On a phone, it becomes visual noise.
Use this decision order:
Do not try to explain the whole game on the cover. The cover’s job is not to teach the rules. Its job is to stop the scroll.
Avoid thin border frames. They look clean in digital mockups, but they expose small cutting and wrapping errors on a handmade box. If the paper shifts 1–2 mm during wrapping, the border will look uneven.
Use full-bleed artwork or thicker edge graphics instead.
Also, do not ignore the side panel. Most prototype box photos are not perfectly front-facing. The box is often shown at an angle with components beside it. Put the game title on the side wall if the box is thick enough. Keep it simple. Do not place small logos or long subtitles where the fold line may distort them.
Tailor your visuals to the platform: Instagram demands a polished ‘hero shot’ of the box as a standalone object, while the Reddit community will ignore you unless you show the components and prove the product has substance
Reddit users often trust process evidence more than polished mockups. A visible handmade edge is not always bad. Sometimes it proves the prototype is real.
When a DIY Custom Game Box Is Enough
A handmade greyboard box is useful when the goal is:
In these situations, the box does not need to survive retail shipping or warehouse stacking. It only needs to communicate the product direction.
This is where DIY production is strong.
You can change the size quickly. You can test a different cover. You can rebuild the lid depth. You can discover that the board should be smaller before paying for a production sample.
That flexibility is valuable.
But do not confuse flexibility with production readiness.
A DIY box does not prove final color accuracy, lamination feel, corner wrapping consistency, carton efficiency, drop-test performance, or long-distance shipping safety.
For Kickstarter creators, this matters. Backers do not receive your handmade prototype. They receive a mass-produced product packed in cartons, shipped internationally, handled by warehouses, and opened months later.
That is a different box problem.
Factory-Side Advice Before You Request a Quote
If you are moving from a DIY custom game box to factory production, do not send only the cover artwork.
Send the box-fit information first.
The useful quotation sequence is:
This avoids the common problem where the supplier quotes a beautiful box that does not match the real packing logic.
For small indie projects, the biggest budget lock-in often happens before the factory receives the file. The designer chooses a box size, builds artwork around it, posts it online, and then feels unable to change it even after the component fit is poor.
Do not lock the public design before the box-fit logic is tested.
Sometimes reducing the box height by 8–10 mm changes carton loading enough to matter. This is not visible on the desk, but in manufacturing, invisible space is still paid space.
Warning, Limitation, and Not Suitable Scenario
A DIY greyboard box is useful for proving direction, not proving production quality.
If your game still has changing card counts, changing board size, or uncertain component volume, do not finalize the cover art too early. The box size may still move, and once the artwork is built around a wrong box, every later correction becomes slower.
If you need a retail-ready product, a handmade box is not enough. It cannot confirm factory corner quality, lamination feel, carton efficiency, shipping durability, or repeatable lid fit.
And if your game has miniatures, thick boards, large inserts, or many loose components, do not rely on a generic Print and play box template. Build the component stack first.